
Getting Started
Create a project, bring in your products, run your first optimization, review the results and send them live.
This guide takes you from a new account to your first approved content. The path is the same for every merchant: bring products in, optimize them, review what was written, then send it live.
The path at a glance
| Step | Screen | What happens |
|---|---|---|
| 1. Products | Dashboard, Data sources | Your catalog comes in from Shopify, WooCommerce or a product feed. |
| 2. Optimize | Product Optimization | You choose products and content types, and Rezolve Ai writes the content. |
| 3. Review | Review | You compare each piece with what your feed has today, then approve, edit or reject it. |
| 4. Go live | Sync or Feeds | Approved content reaches your store, or leaves as a feed. |
The last step depends on your platform. Shopify and WooCommerce projects use Sync. A Feeds and files project has no store to sync to, so it uses Feeds.
A strip at the top of the Dashboard, Product Optimization, Review and Sync screens shows these steps (Products, Optimize, Review, Sync) and links to each one.
1. Create your account
Sign up at ace.authoritas.com. When you sign in for the first time you have no project yet, so Rezolve Ai opens the setup wizard.
2. Follow the setup wizard
The wizard creates your first project and walks you through to your first content. Its steps are listed on the left. Back returns to the previous step, and Skip for now leaves the wizard and opens the Dashboard.
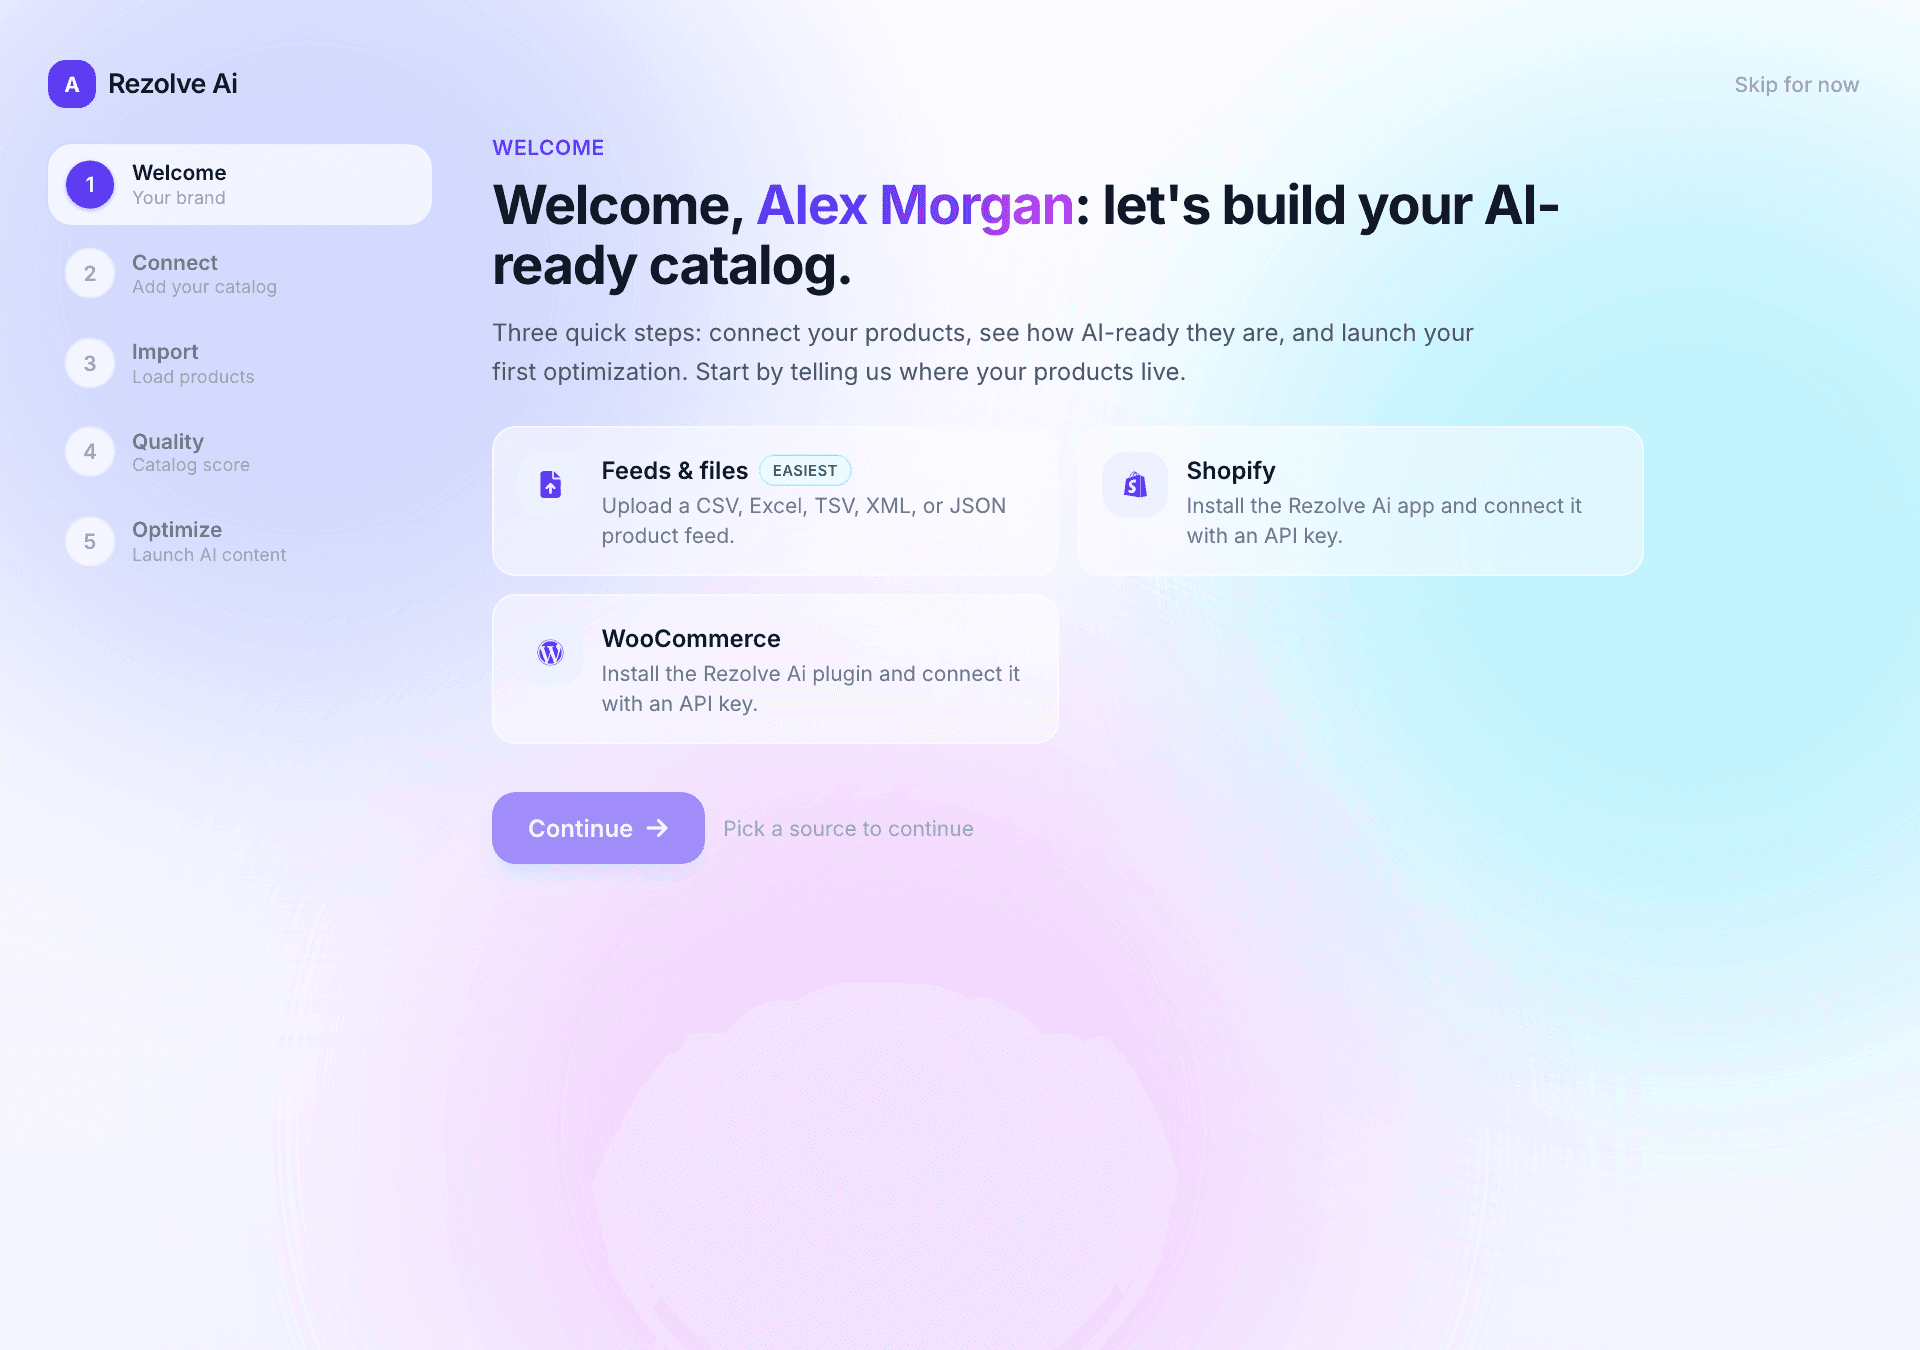
Welcome: choose where your products live
Pick one of three sources:
- Feeds & files: upload a CSV, Excel, TSV, XML or JSON product feed. It is marked Easiest.
- Shopify: install the Rezolve Ai app and connect it with an API key.
- WooCommerce: install the Rezolve Ai plugin and connect it with an API key.
What happens next depends on your choice.
If you chose Shopify or WooCommerce
- Click Get your API key. Rezolve Ai creates your project and opens the API keys screen with a new key ready to copy. The full key is shown once.
- Install the Rezolve Ai app (Shopify) or plugin (WordPress) and paste the key into it.
- Your catalog syncs into the project.
The walkthroughs are Set up on Shopify and Set up on WordPress. When your products have arrived, continue from Optimize your products below.
If you chose Feeds & files
The wizard continues with these steps.
- Welcome. Tell us a little about your brand: Brand or store name, Website and, if you like, Brand voice in one line. Scan my site to fill this in reads your homepage and fills the blank fields for you. Click Continue.
- Connect. Drop your product feed on the page or click Browse files. Download CSV template gives you a file with the expected columns.
- Map. If your file has columns to match, check that each one points to the right product field. Rezolve Ai matches the ones it recognizes and tells you how many it matched. This step is skipped when no mapping is needed.
- Import. Your products are brought in. The import runs on our servers, so you can leave the tab and come back.
- Quality. You see how AI-ready your catalog is: an overall quality score, field completeness for titles, descriptions and images, and your top categories. Click Lift these with AI.
- Optimize. Rezolve Ai picks up to 25 of your lowest-scoring products and sets up a first run with real-life scenario cards and product schema markup. You can open Tune your brand voice to set the tone and audience. Click Launch first optimization, or I'll do this later to go to the Dashboard.
After launching, click Review your content to see the results as they arrive.
Pick up where you left off
If you leave the wizard part way through, the Dashboard shows a Resume setup button that takes you back to the step you were on.
3. Optimize your products
Open Workflow, Product Optimization, or go to Product Optimization. The wizard there has four steps: Select Products, Enrich Context, Content Types and Launch.
For a first run:
- Select a small set of products.
- Skip Enrich Context, or click Generate with AI to build a content strategy for your selection.
- Pick a few content types, or use a suggested bundle such as GEO Essentials.
- On Launch, use Preview a sample to read one real result, then click Start optimization.
Generating content uses credits. The wizard shows an estimate before you launch, and the Credits meter at the bottom of the left menu shows your balance. See Product Optimization and Credits.
4. Review what was written
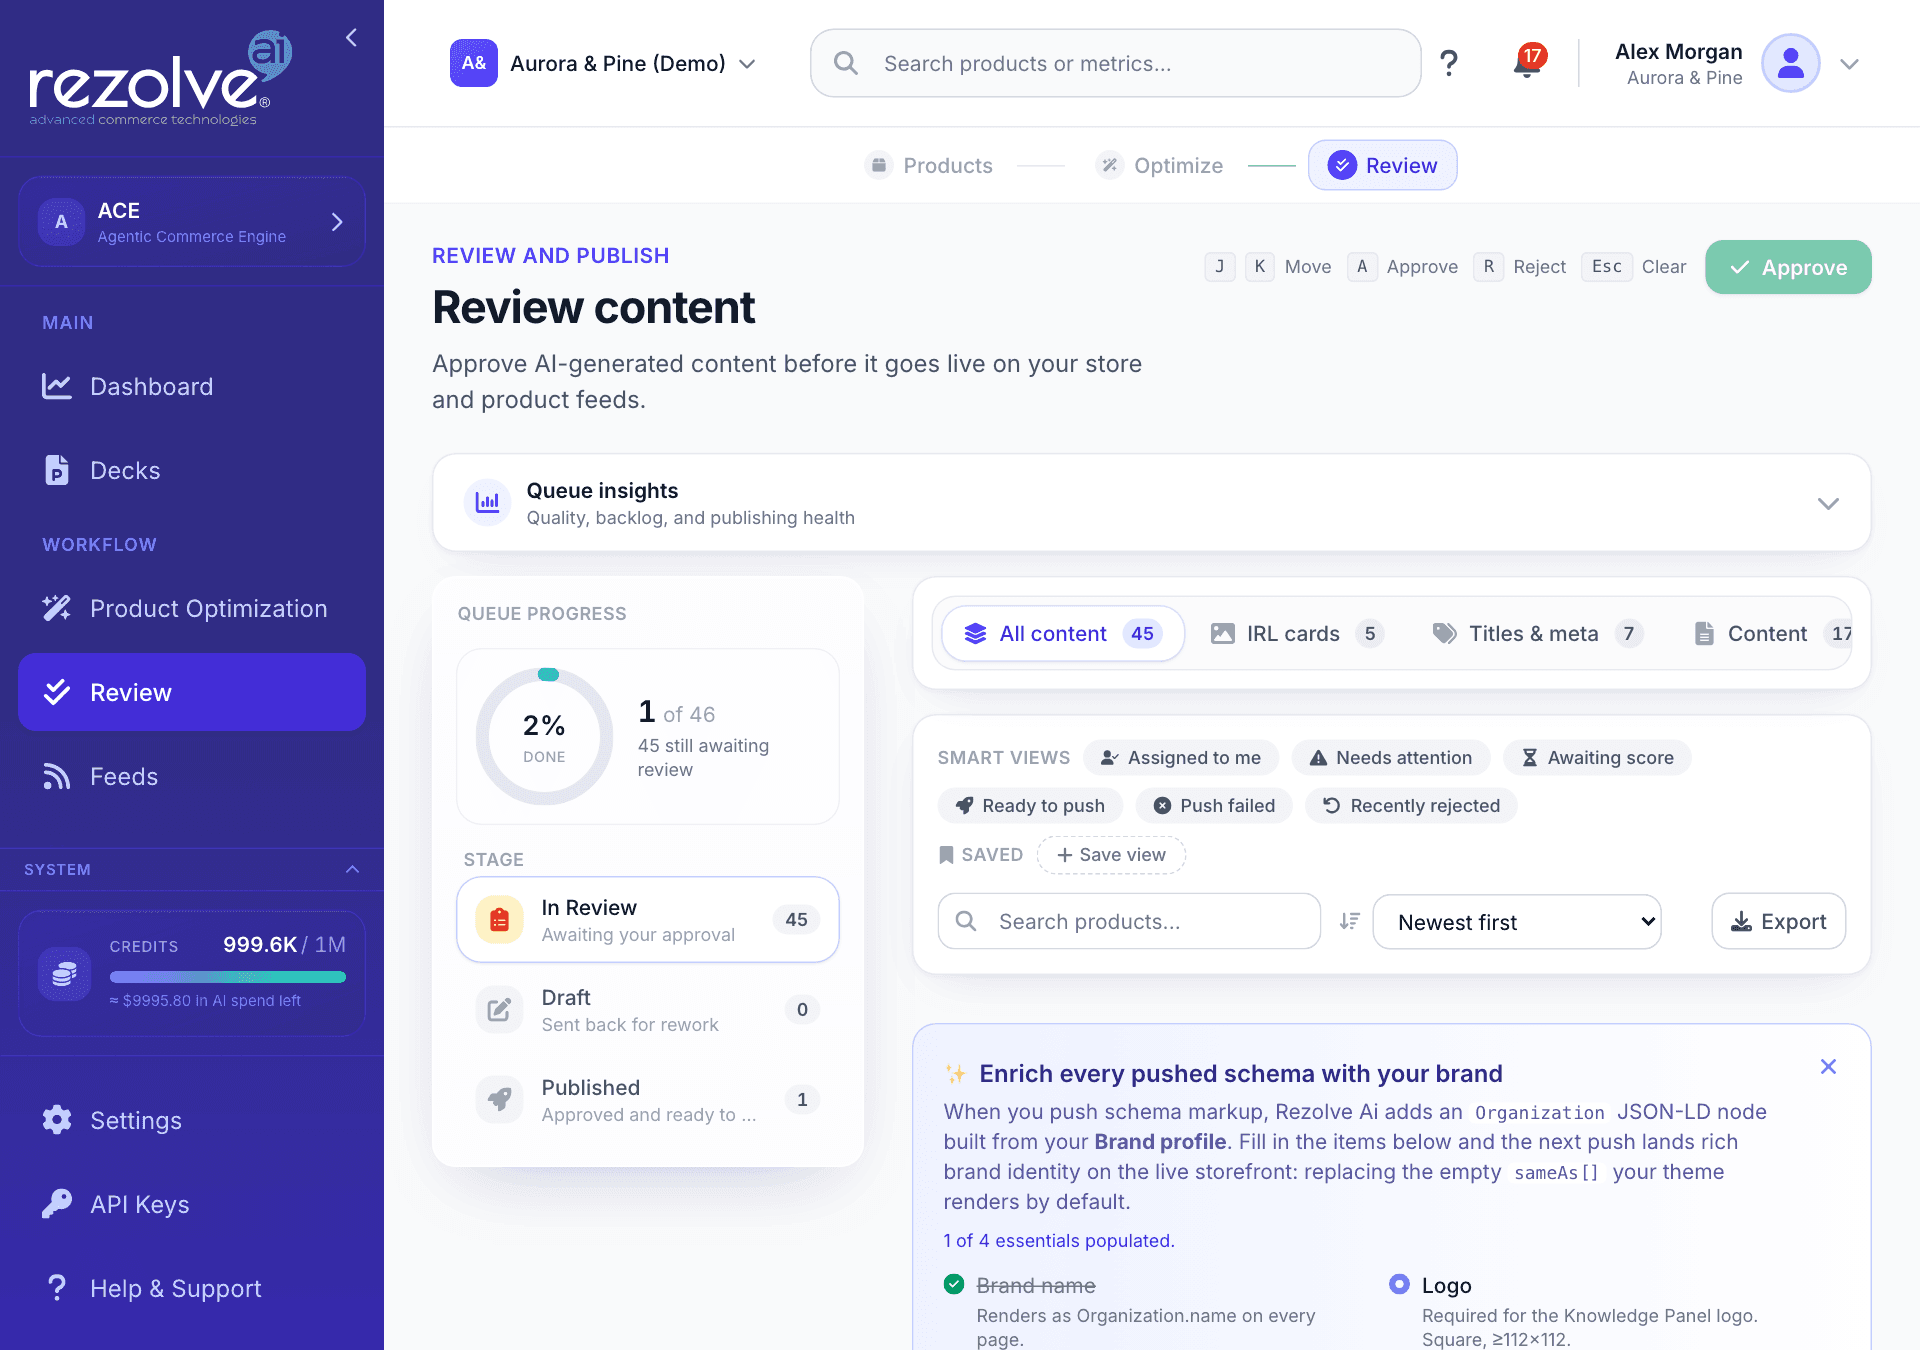
Open Workflow, Review, or go to Review. Everything the run generated waits here, grouped by product, next to the value your feed carries today.
- Approve what you are happy with.
- Edit anything that needs a change.
- Reject what misses the mark, with a reason.
Nothing reaches your store or your feeds until you approve it. See Review and Approval.
5. Send it live
Shopify and WooCommerce projects. Approved content reaches your product pages through the Rezolve Ai app or plugin. Open Workflow, Sync to check status and the audit trail. See Sync.
Feeds and files projects. There is no Sync screen, because there is no store to push to. Your approved content leaves through Workflow, Feeds, as a feed file you download or a hosted feed URL that a shopping channel collects. See Feeds.
Find your way around
The Get started checklist
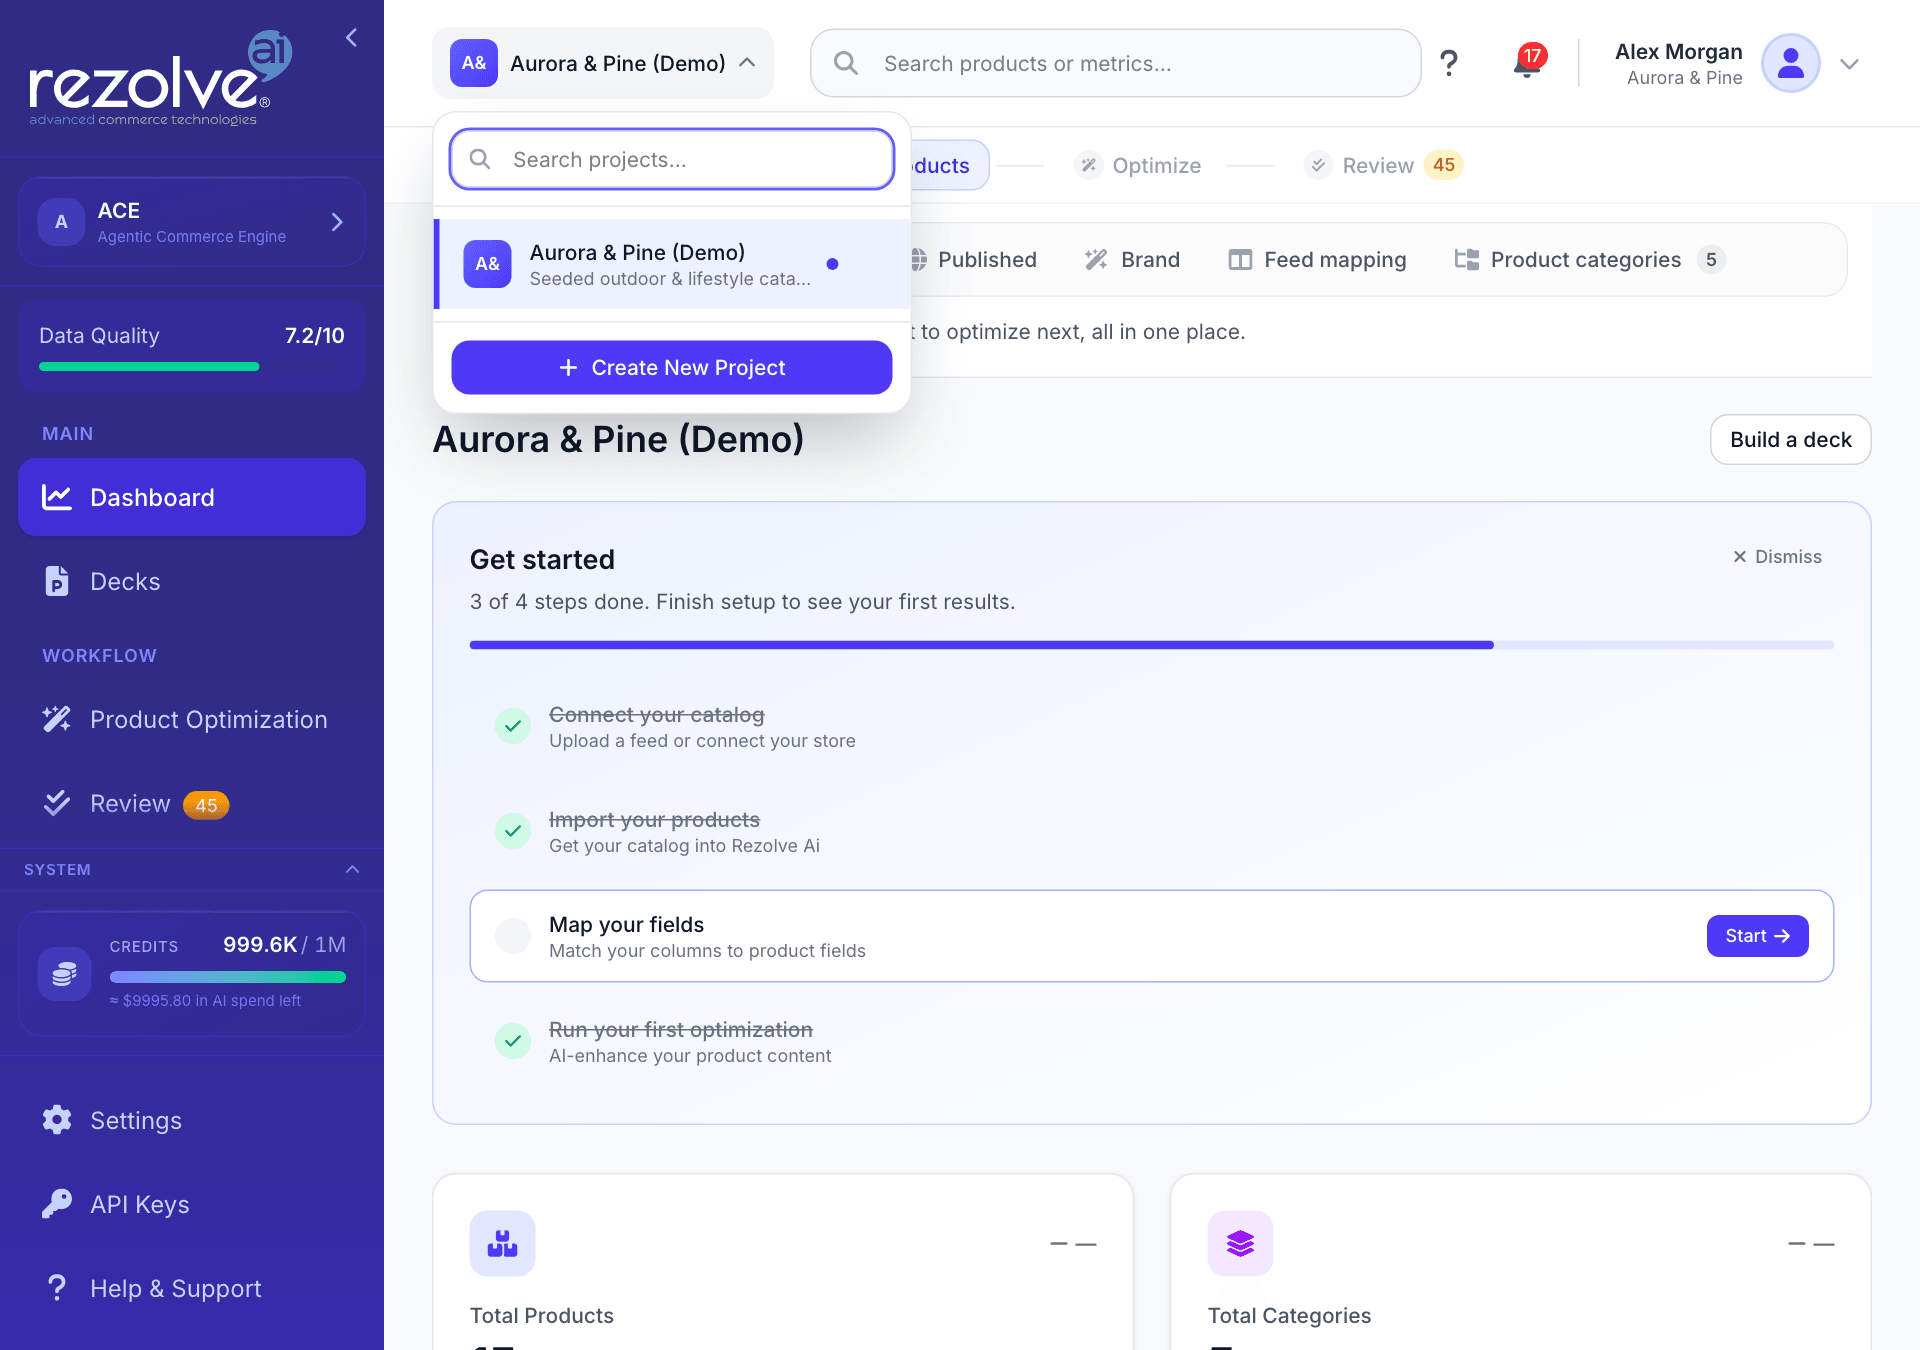
On a new project, the Dashboard shows a Get started card with the setup steps: connect your catalog, import your products, map your fields, run your first optimization, and publish to your store. Each step is ticked off when you have actually done it, and the next one has a Start button. Steps that do not apply to your platform are left out. The card goes away when everything is done, or when you click Dismiss.
The project switcher
The project name at the top of the screen is the project switcher. Open it to:
- Switch to another project. You stay on the same section of the app.
- Search your projects by name.
- Rename a project with the pencil icon.
- Click Create New Project to start the setup wizard for another store or catalog.
Each project has its own products, content, settings and team, and its own platform.
The left menu
| Section | What is in it |
|---|---|
| Main | Dashboard and Decks. |
| Workflow | Product Optimization, Review, Sync, Feeds and UCP. |
| Grow | Content Hub, Agentic Readiness and Experiments. |
| AI Search | Overview, Prompts, Brands, Sources, Actions and Setup. |
| System | Your credits, Settings, API Keys and Help & Support. |
Sync appears on Shopify and WooCommerce projects only.
Good habits for the first week
- Start with a small set of products so you can read every result.
- Fill in the Brand view on the Dashboard early. Your website and brand voice shape everything written for you.
- Check the Data Quality tile in the left menu. Better source data gives better content.
- Invite the people who will review and approve under Settings, Team.
Where to go next
- Connecting Data Sources: every way to bring products in, and how to keep them current.
- Dashboard and Analytics: what each Dashboard view shows.
- Product Optimization: every content type and setting.
- Review and Approval: layouts, shortcuts, team review and export.
- Content Hub: listicles and blog articles.
- AI Search: how AI answer engines mention your brand.
- Frequently Asked Questions
Using Rezolve Ai
Guides to every part of the Rezolve Ai app, from connecting your products to reviewing content, measuring AI Search and running experiments.
Set up on Shopify
Install the Rezolve Ai app from the Shopify App Store, connect it with your Rezolve Ai API key, work through the six setup steps, and find your way around every screen.